

Use this guide to assemble your Pilates Combo Chair, adjust the handles and spring resistance, and keep your equipment in good condition. Please read all safety instructions before assembly or use. You can bookmark this page for future reference or contact our customer support team to request a downloadable PDF version of the user manual.
Contents
01/ Safety Instructions
02/ Product Overview
03/ Packing List
04/ Assembly Notes
05/ Using Your Pilates Combo Chair
06/ Maintenance & Care
07/ Storage& Environment
08/ After-Sales Support

Safety Instructions
Read all instructions carefully before using the equipment.
Before Use:
· Place the chair on a flat, stable, non-slip surface.
· Keep at least 1 meter of clear space around the equipment.
· Ensure all screws, nuts, springs, pedals, and handles are securely installed.
· Check that the pedals move smoothly and return properly.
· Do not use the equipment if any part is loose, damaged, worn, or abnormal.
· Maximum user weight: 150 kg / 330 lbs.
During Use:
· Always control the pedals and do not release them suddenly.
· Keep fingers, hands, and feet away from moving parts.
· Wear non-slip socks or exercise barefoot.
· Children must use the equipment only under adult supervision.
· Advanced exercises should be performed under professional supervision.
Spring Safety:
· Springs are under tension during use.
· Never adjust springs while the pedals are under load.
· Ensure springs are fully secured before training.
Product Overview
The Pilates Combo Chair is a multifunctional training apparatus suitable for core training, balance training, and upper and lower body strength training.
Key Features:
Split Pedal System
Compact Footprint for Home or Studio Use
Adjustable Spring Resistance
Adjustable Height Handles
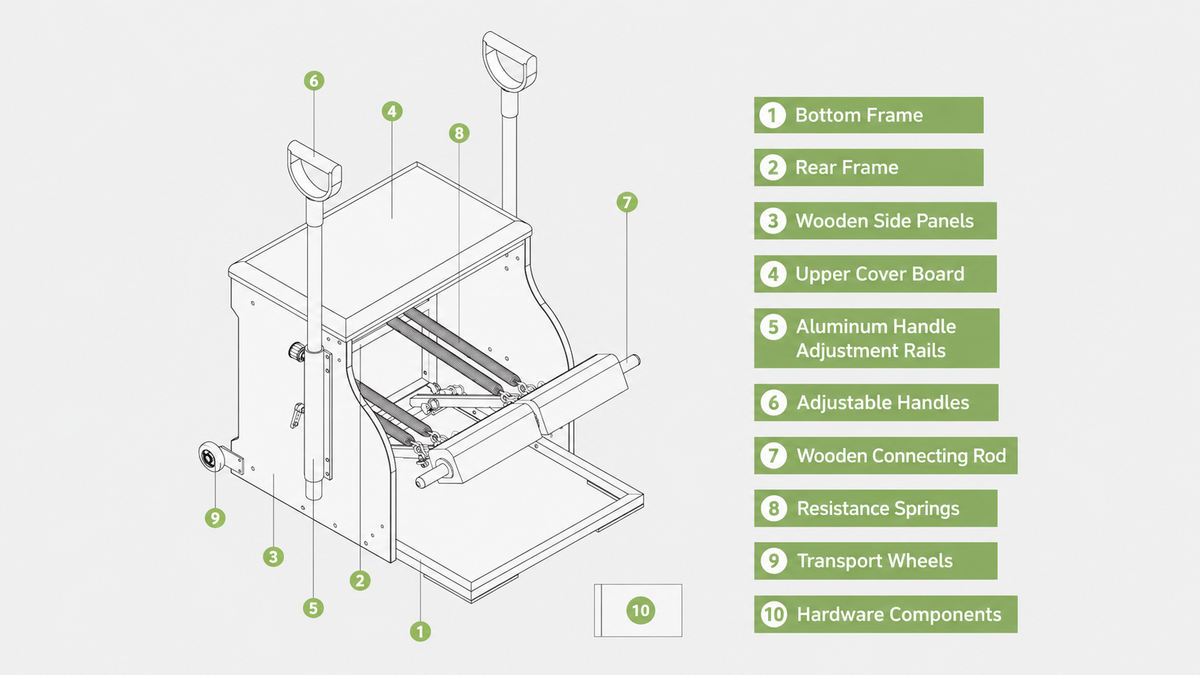
1 Bottom Frame
2 Rear Frame
3 Wooden Side Panels
4 Upper Cover Board
5 Aluminum Handle Adjustment Rails
6 Adjustable Handles
7 Wooden Connecting Rod
8 Resistance Springs
9 Transport Wheels
10 Hardware Components

Packing List
Check all components carefully before assembly. If any parts are missing or damaged, contact customer support before use.

Assembly Notes
Assembly is recommended for two adults.Do not fully tighten screws until all frame parts are correctly aligned.
Step 1: Install the Spring Hooks
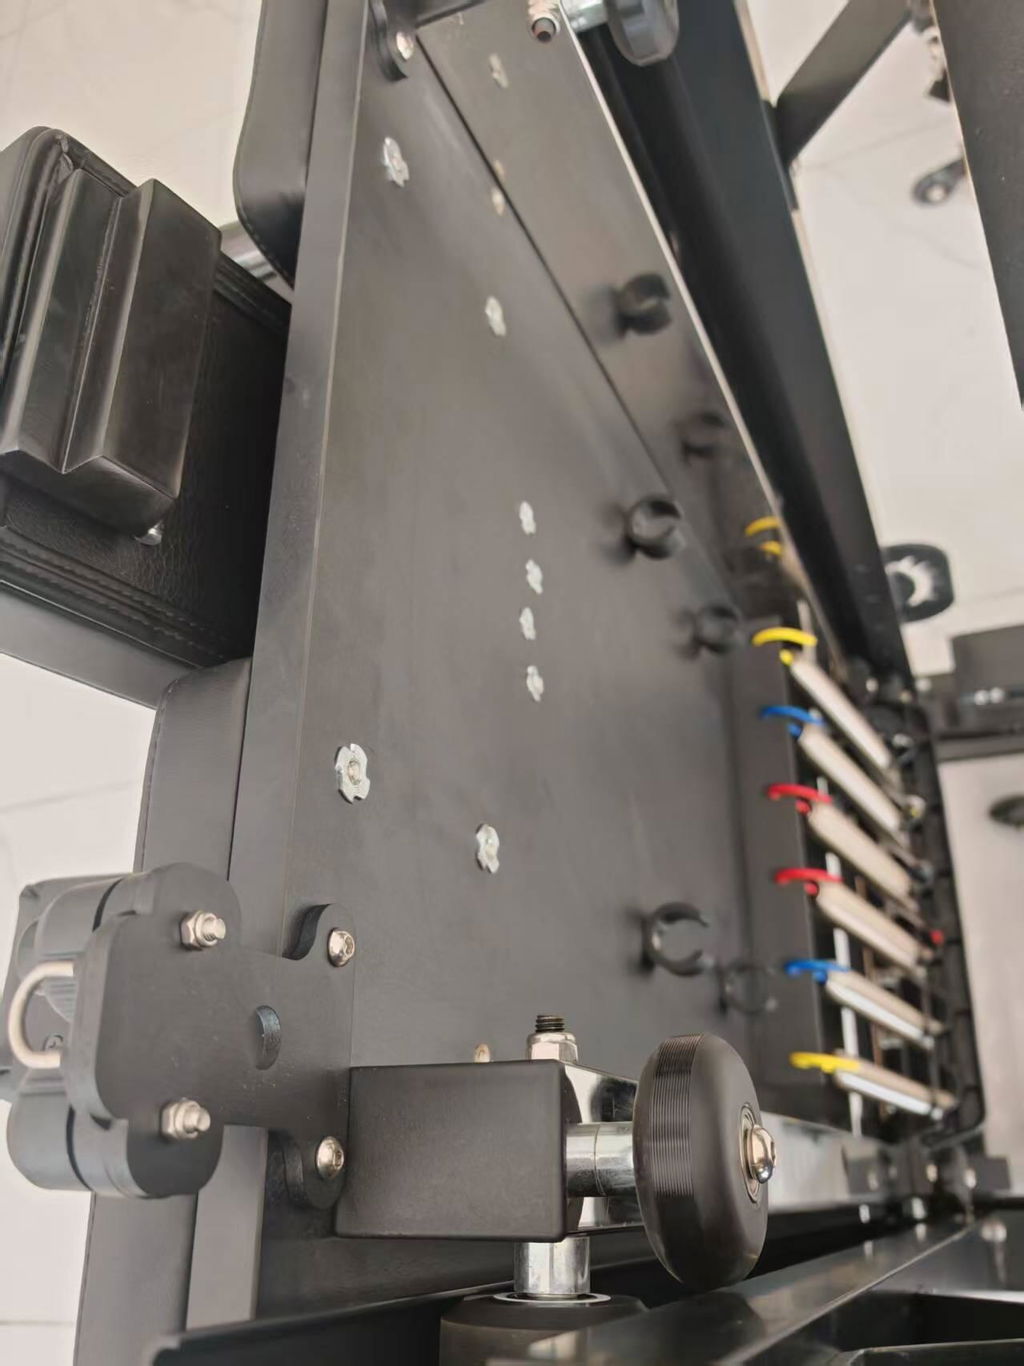
Using No. 3 Screws and T-Nuts, install 2 spring hooks on the upper and lower positions of one Wooden Side Panel as shown. After installation, repeat the same process for the other Wooden Side Panel.

Step 2: Install the Aluminum Handle Adjustment Rails
Using No. 1 Screws and Nuts, install 1 aluminum handle adjustment rail onto the Wooden Side Panel.
Important: The black adjustment knob must face outward for easy handle height adjustment later. After installation, repeat the same process for the other Wooden Side Panel.

Step 3: Install the Transport Wheels
Using No. 5 Screws and Nuts, install 1 transport wheel onto the bottom position of the Wooden Side Panel.
After installation, repeat the same process for the other Wooden Side Panel.

Step 4: Install the Front Support Bar
Place the two Wooden Side Panels on both sides of the Bottom Frame. Using No. 1 Screws, install the black metal support bar at the front position to connect the two Wooden Side Panels and support the Upper Cover Board.
Important: The black metal support bar is used only for structural support of the frame and upper cover board. It is NOT the wooden connecting rod, which is used for pedal synchronization. Do not confuse the two parts during installation.

Step 5: Secure the Wooden Side Panels to the Rear Frame and Bottom Frame
Align the upper and lower rear holes, then use 2 No. 4 Screws and Nuts to secure the side panel to the Rear Frame.
Align the bottom 3 holes, then use 3 No. 4 Screws and Nuts to secure the side panel to the Bottom Frame.
Repeat the same process for the opposite side.
Important: Align all holes before tightening screws. Do not fully tighten the screws until both side panels are correctly aligned and the frame is level.

Step 6: Install the Upper Cover Board
Place the Upper Cover Board onto the black metal support bar and the rear frame. Align the holes correctly and secure the Upper Cover Board with No. 2 Screws. Ensure the cover board is firmly installed before use.

Step 7: Install the Springs
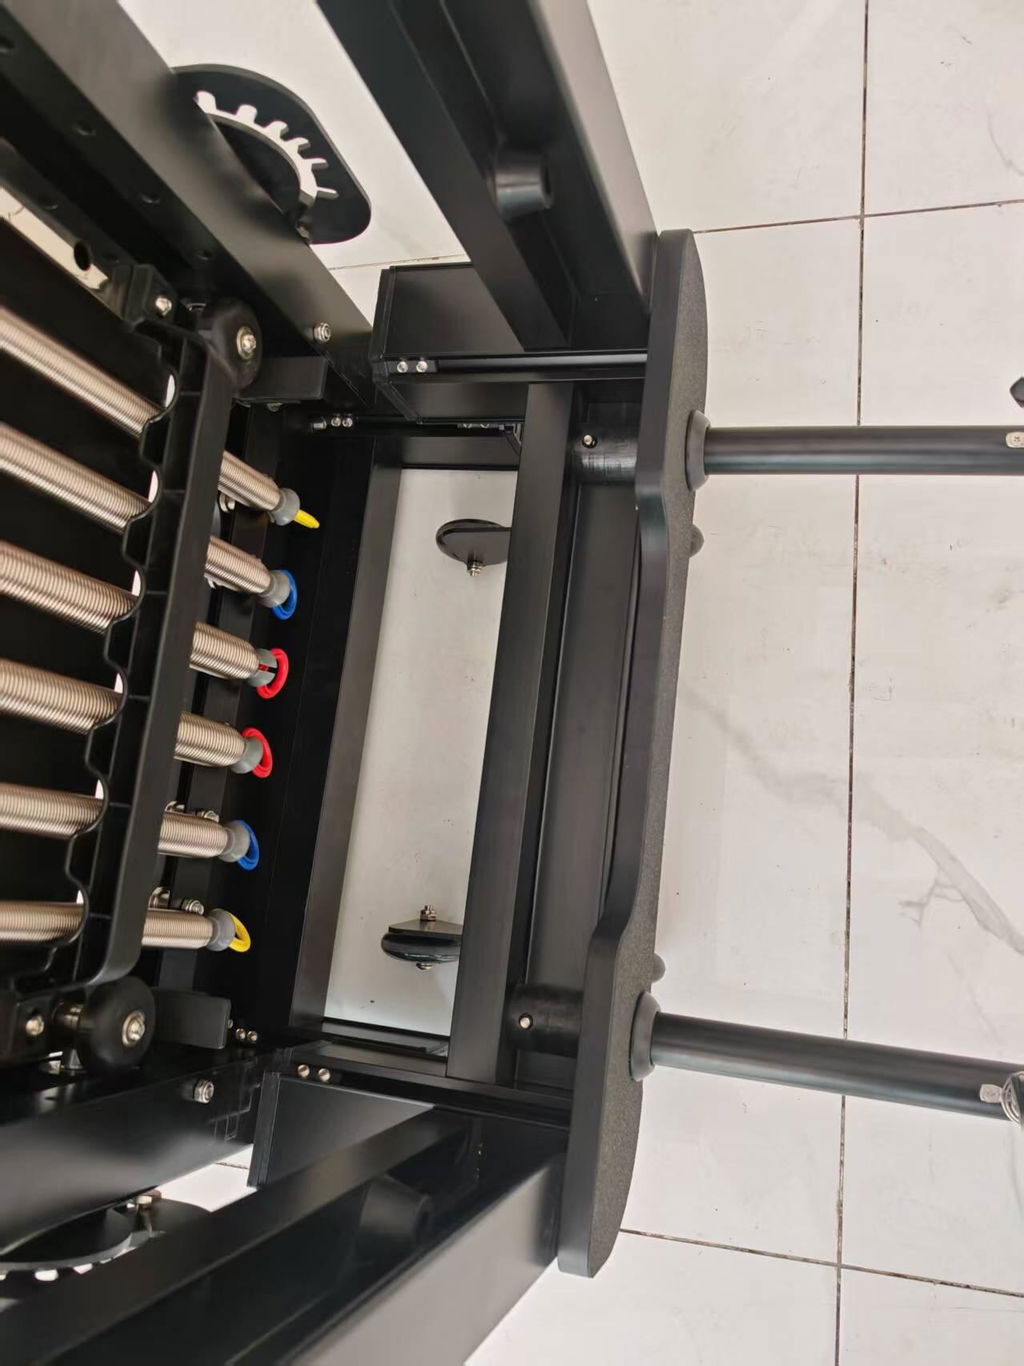
Install the springs onto the spring attachment points on the bottom frame and the rear frame.
Important: Ensure all springs are securely attached before use. Red springs provide heavier resistance, green springs provide lighter resistance.

Step 8: Install the Adjustable Handles
Insert each Adjustable Handle into the Aluminum Handle Adjustment Rail. Align the height adjustment holes on the handle with the positioning pin on the rail. Pull and release the positioning pin to lock the handle into the desired height position. Tighten the black adjustment knob securely.
Repeat the same process for the other handle.
Important: Before use, ensure both handles are inserted to the same height, the positioning pins are fully engaged, and the black adjustment knobs are firmly tightened.

Step 9: Install the Wooden Connecting Rod
Insert the Wooden Connecting Rod into the designated position. Ensure it is properly seated and stable before use.

Using Your Pilates Combo Chair
Place the equipment on a flat, non-slip surface and keep it away from humid environments.
Before each workout:
- Ensure all screws, springs, and handles are securely installed
- Check that pedals move smoothly
- Confirm the equipment is stable and level
- Stop using immediately if unusual noise or looseness is detected

Handle Adjustment
Loosen the lower positioning pin.
Loosen the upper adjustment knob and pull it outward.
Adjust the handles to the desired height.
Release the upper adjustment knob so that the positioning pin clicks into the adjustment hole. Tighten the upper adjustment knob securely.
Finally, tighten the lower positioning pin.
Before use, ensure both handles are fully locked and stable.
Single Pedal Mode:
Insert the wooden connecting rod to synchronize both pedals.
Recommended for beginners and traditional Chair exercises.
Split Pedal Mode:
Remove the wooden connecting rod to allow independent pedal movement.
Recommended for balance, rotational, and advanced training.
Spring Resistance Adjustment
Higher spring position = heavier resistance
Lower spring position = lighter resistance
Red Springs: Higher resistance
Green Springs: Lighter resistance
To adjust spring resistance:
- Stabilize the pedals by hand
- Remove the spring from the current position
- Attach the spring to the new position
- Ensure the spring is fully secured
Warning: Never adjust springs while under load.

Maintenance & Care
Regular maintenance helps keep the equipment safe and performing properly.
· Wipe the metal frame with a soft cloth after use.
· Clean the upholstery with mild soapy water, neutral cleaner, or leather cleaner.
· Keep the equipment clean and dry.
· Check springs, handles, pedals, screws, and bolts regularly.
· Inspect springs monthly and replace them if rust, deformation, cracks, loss of tension, or reduced performance appears.
Do not use alcohol, bleach, or corrosive chemicals for cleaning.
Storage & Environment
- Store the Pilates Combo Chair indoors in a dry, clean environment.
- Avoid direct sunlight, high humidity, extreme temperatures, and outdoor storage.
- Keep the equipment covered when not in use for extended periods.
- Use the transport wheels to move the equipment carefully.
- Lift slightly when crossing uneven or rough surfaces.
- Do not drag the chair across the floor.
- Place the equipment on a flat, stable, non-slip surface during use.
- Maintain at least 1 meter of clearance around the equipment.
Product Dimensions: 770 × 590 × 631 mm
Approximate Footprint: 0.45 m²

After-Sales Support
If you have any questions about assembly, usage, or accessories, please don't hesitate to contact our customer support team.
Share:
Pilates Reformer Spring Guide: Which Springs Should You Use?
Pilates Ladder Barrel User Manual | Assembly & Care Guide